On social media a photo can get launched and seen by millions before you know it…and you can’t change it once it goes out. As hunters, and as representatives of our hunting community and our sport, you owe it to yourself and all other hunters in the world to be ethical and tasteful with your photos. On social media the picture will be seen by more non-hunters than hunters or anti-hunters so we must protect our image. Plus, we want the photo to look its best so we can cherish the memories. These tips will help you take excellent “grip-n-grin” shots of your trophy.
- When taking success photos make sure to pose the animal in a respectful, tasteful way. Wipe away as much blood as possible. If the tongue is sticking out of the mouth, push it back in or cut it off. If you’ve already field-dressed the animal, pose it so you cannot see the open chest cavity. We’re all hunters and can handle the things others may label gross or bloody, but non-hunters may see your image too, again, especially if it goes out on social media. Pose the animal in a natural setting. The back of your pickup may be easy, but it doesn’t make for the best photo.
- If the animal has been hanging overnight the eyes may begin sinking into the skull – an inexpensive fix is a set of ceramic or plastic eyes that you can set in place for the photo. Your local taxidermist will likely have a supply of these to choose from.
- Try to allow as much light on the subjects (hunter and animal) as possible. If you’re in full-sun, shoot with a flash to reduce the “cap-brim shadow” so you can see the hunter’s face. A flash, or fill flash may be best in most situations to make sure you capture the shot. Most newer-style digital cameras work great in auto mode.
- The photographer should communicate with the subject(s) and let them know when the shutter will trigger. This will eliminate stupid looks or catching the subject blinking.
- SMILE! Nobody likes to look at a “sourpuss.” Remember, you just had a successful hunt!
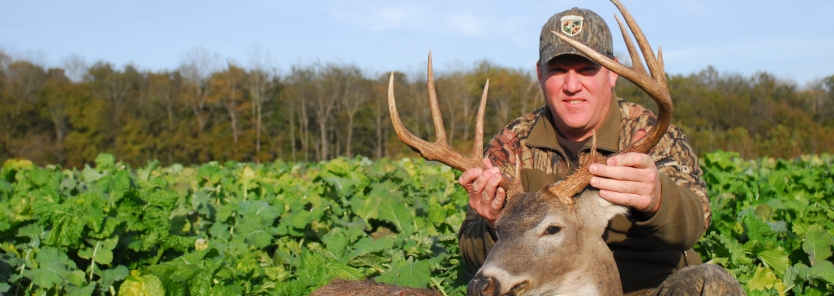
- Fill the frame with the subject and don’t pose so your face will be hidden behind the antlers. Often you have photos where the subject is centered on the bottom of the frame. In a traditional “grip-n-grin” style photo you should see as much space below the subject as above and even spacing on both the left and right.
- We want to make those antlers look as big as possible, right? Most camera lenses will have a “fish-eye lens” affect making whatever is closest to the camera appear larger. Always make sure the buck’s head is closest to the camera lens. You don’t want the photo to look stupid – some people place themselves several feet behind the animal. Guess what, we can tell you just shot a little buck and are trying to make it look big. Be realistic with this and the buck will look as big as possible. Make sure you don’t set your bow or other objects out in front of the animal. This gives something to compare size to, and again, if the object is closest to the camera, it will appear larger.
The main thing most of us want trophy photos for is to remember the great time and share it with friends and family. Just remember to show the animal respect and follow these tips and… smile.