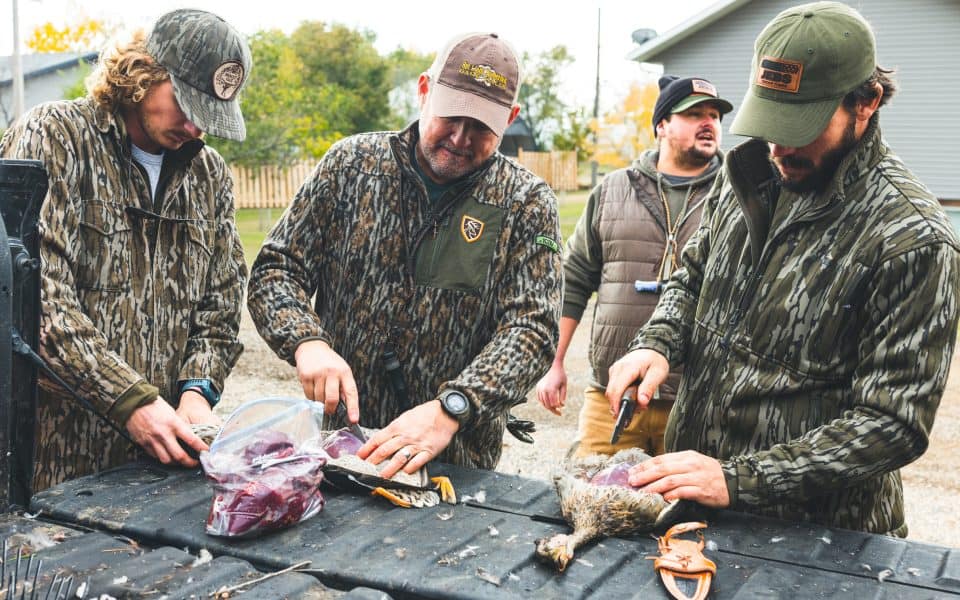
Of the many misconceptions there are surrounding the eating quality of various wild game, few are more misunderstood than the duck. The “g-word” (gamey) is far too common a saying when it comes to eating wild ducks, and countless five-star cuts of meat are wasted each year due to a general confusion of how to handle and prepare this wild delicacy. Properly preparing wild ducks can make all the difference in their flavor and appeal. I know everyone who reads this will likely say they’ve tried it every way it can be tried and they simply don’t like the flavor. “Tastes like liver!” Well, I suppose any cut of meat can taste bad if it’s not prepared properly. Hear me out – there’s a whole cook book worth of tricks and recipes to be written on this species and I promise it will change your perspective and have you fighting with your hunting buddies over who gets to take the birds after the hunt.
Step One: Proper Handling of Ducks After the Hunt
As it is with any wild game – a tender, delicious meal placed on the table begins all the way back at the hunt just seconds after pulling the trigger. How you handle the animal from the very beginning will play into what ends up on your table and how it tastes. For ducks, it’s really pretty simple. Keeping them clean, cool and out of direct sunlight until they are ready to be butchered is all you need to worry about. As long as they’re in a cooler or your outside temperatures are below 40° F, you can take your time between the hunt and the butchering.
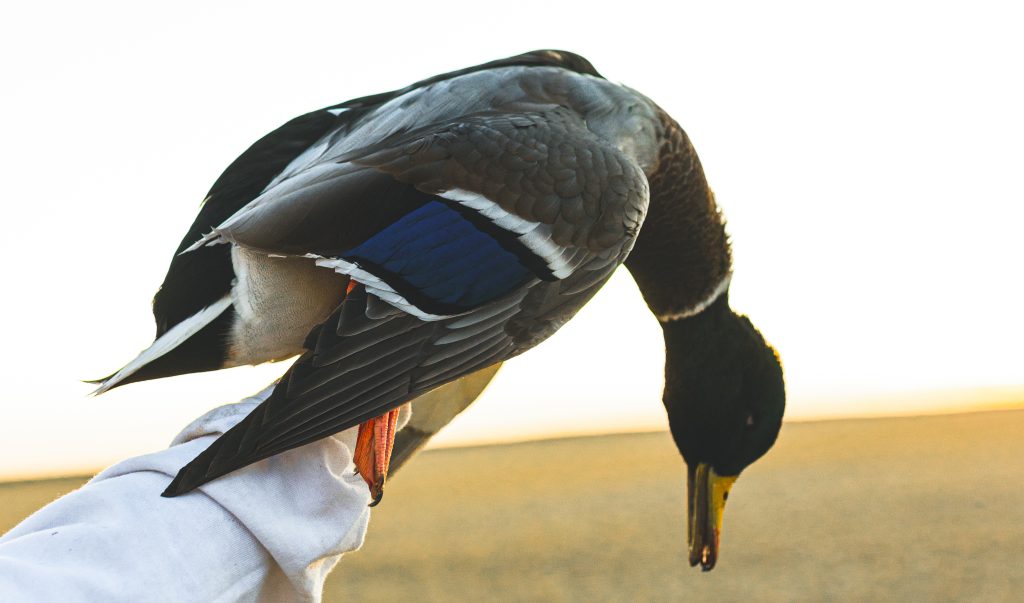
Rob Kinney
When the time comes to cleaning the birds, patience and attention to detail are required. It’s a labor of love and you can’t rush it. Speeding through this process is probably accountable for half of the non-duck-eaters out there today. The quickest way to handle them is also the worst – peel the skin back, cut the breast out, throw it in a bag and freeze it. If this is your method and you say you don’t like eating ducks, I’m not surprised! But don’t blame the duck. Here are my top lessons learned when it comes to handling ducks:
Butchering Ducks: Key Lessons for Success
Lesson #1: Always Keep the Skin on!
The fat and skin on a duck, especially your big ducks, are without a doubt the number one requirement to serve up something delicious. In fact, duck fat is sold separately in stores because of it’s delectable, rich flavor. This adds a considerable amount of processing time, but if you want to get it right, this is non-negotiable. You can pluck only the breasts and remove them with the skin, or pluck the whole duck. I have a number of quick recipe options later on for both.
If you’re like me and don’t have a local duck-plucker nearby, getting all the feathers removed usually takes two sessions. I try my best in the first cleaning session to get 95% of the feathers removed, but in the interest of time I save being a perfectionist for later. Once you’ve washed the mostly de-feathered meat, It’s on to Lesson #2, or you could try one of the following methods.
There are two other methods that may help you to speed up the feather removal process; scalding or the use of Duck Wax. If you choose to scald them, which is a common way to dress chickens, you will need to dunk the carcass into scalding hot water (145-150 degrees F) for about 30 seconds to as long as one minute. However, ducks are harder to pluck than chickens. For the cleanest carcass, you may want to use Duck Wax to remove any remaining feathers. This works great on both pin-feathers and later in the season, all of the downy feathers.
Lesson #2: Never Freeze It Right Away
Like other red meats, aging can complement a duck very well. I don’t recommend going for a full dry-aging process, as the losses wouldn’t be worth it for what is already a very small cut of meat. You can hang the whole bird for two or three days or leave the cleaned, washed and dried meat (skin-on) in a bag in a draining cooler for that same amount of time. You don’t have to go 10+ days as you might with a larger animal like a deer, but you have to at least wait for the rigor mortis to pass which is about 48 hours. This must be done in a cool, controlled environment to prevent bacteria growth.
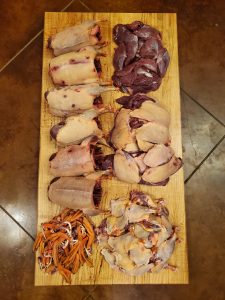
Henri Watson
If you freeze the meat during this period, it can be tough…and stay tough. After this short aging period, pull the meat back out and give it a final detail cleaning. Pluck away any remaining feathers, pull every pin feather with tweezers, pat them try and singe the remaining hair-like feathers with a torch or lighter (unless you have used the waxing method, then these feathers should be out). Then, inspect for any obvious shot BBs lodged in the meat. Follow every hole and see if it’s empty or holding a BB. You also want to dig any feathers out of the shot holes as they often get lodged inside the meat.
Nobody wants a bite full of feathers! Once complete, you can bag and freeze the meat so that it’s ready to cook next time you pull it out. The only time I remove the skin on ducks is if it’s too shot up, or there are way too many pin feathers to deal with. These can be quickly breasted out and saved for your classic popper recipes, but it should be your last resort.
Lesson #3: Pair with Something Sweet
Don’t come into my house and tell me ducks are gamey or livery. But that being said, I’ll admit they do have a richer flavor than most other species we bring out of the woods. That’s why lesson 3 is so important – you can’t pair a heavy flavored meat with a heavy flavored sauce. You have to elevate it with something light, sweet, and maybe a little spicy. Citrus flavors go well, as do jams and jellies mixed with some spice. My go-to is a jar of candied jalapeños blended 50/50 with grape jelly. It’s the perfect combination of rich flavor and a light, sweet sauce with a little kick. If you’re feeling saucy, you can look up a red wine reduction sauce recipe that incorporates some sweetness. Otherwise, a store bought pepper jelly will do just fine.
Lesson #4: Don’t Overcook
With the limited exceptions of slow-cook recipes like duck and grits, gumbo, etc., the golden rule of cooking duck is to never pass medium rare. If you say it tastes like liver, it was over-cooked, plain and simple. The meat should be pink all the way through, even a bit on the rare side if you are so inclined.
Best Cuts of Duck Meat
Without a doubt, if you’ve eaten wild ducks there’s a 99% chance it was a skinless breast. If you want to get the most out of what this animal has to offer you have to follow lesson number one and keep the skin on, but the next most important topic is what cuts of meat you can actually walk away with if you just invest a bit more time in the preparation. I promise you it’s worth it and below are my top cuts to make sure you try this season.
Skin-on Breasts
As I said before, this is still the fastest and easiest way to get a phenomenal result from your wild ducks. The best way to cook these breasts is to season and slice/score diagonally through the skin in three places, all the way across. This will prevent the skin from cupping while cooking, ensuring the breast lays flat in the pan and gets a good crispiness to it. Start the breasts in a cold skillet, skin-side down, with a spoonful of butter and spoonful of high temperature cooking oil.
You want to start in a cold skillet so that the fat will render as the pan warms up, which will help you get a good crispy skin in the end. Turn the skillet on medium-high and bring them up to a hot simmer. Spoon the hot butter over the breasts constantly and when the skin looks good and crispy all the way through, flip them over for 20 seconds then pull them off to rest. The meat should be medium rare or pink all the way through with a crispy buttery skin on top. You can’t beat it.
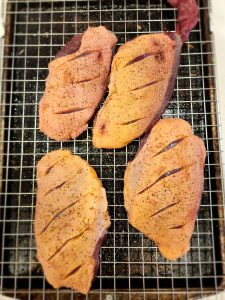
Henri Watson
To really put this one over the top though, you have to bring in Lesson #3 above and pair with something sweet.
Whole Duck Recipes
There’s plenty that can be done with a whole plucked duck, primarily roasting and grilling, which are great, but my favorite thing lately has been duck and grits. Simple and delicious, this recipe does not require a culinary degree or even a puffy white hat. Get your oven to 225° F. In a roasting pan throw half a chopped onion, a big spoon of minced garlic, a sprig of rosemary, sprig of thyme, a bay leaf, handful of mushrooms, a few glugs of Worcestershire and your favorite steak marinade, maybe a splash of red wine, and of course, a stick of butter.
Season your whole plucked duck with whatever you like – any steak seasoning will work, and place them breast-side-down in the pan. Pop it in the oven for about 90 minutes, stirring and basting the ducks about half way through. While the ducks roast, look up a good cheese grits recipe (very simple) and fix them up. When the ducks are done, remove the skin and shred the meat over a bowl of cheese grits, topping with a few spoons of sauce from the pan. Simple and absolutely guaranteed to impress.
Leg and Thigh Quarters
Hear me out. Seriously. This is the best thing you can take from a duck. It requires extra effort, but I’d trade any other cut of meat for duck legs without hesitation. I’ve personally spent a lot of time over the years figuring out how to get this right so you don’t have to. There’s a simple way to prepare them and you’ll be stealing duck legs from your friends for the rest of your hunting life.
Henri Watson
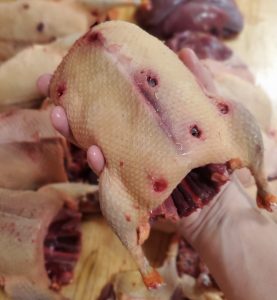
Once plucked, remove the leg and thigh quarter with the skin on. The first most important step is to pull the lower leg off with the tendons still attached. This takes finesse and a bit of practice. You have to carefully ring the lower leg with a sharp knife just deep enough to get through the skin but not so deep that you cut the tendons below the skin. With the skin carefully ringed around the lower leg, pull the thigh and the lower leg apart so that the lower leg comes out and pulls with it all the tendons from the thigh. This is the key to having a fork-tender thigh quarter. If the tendons stay in the thigh, it will be tough.
Now for the greatest recipe in all of duck cooking – I’ll call it “Hunter’s Confit.” Duck confit is an age-old French delicacy, but traditional methods of preparation can be pricey or difficult to accomplish. I’ve experimented with a number of ways to make this easier and still achieve a high-quality result. The basics of confit are to salt cure the meat for 24 hours then cook very slowly at low temperature in duck fat until the thighs are fall-apart tender. The typical way to do this is to buy a few jars of duck fat from a specialty grocery store and slow cook in the oven. This works, of course, but duck fat can be expensive.
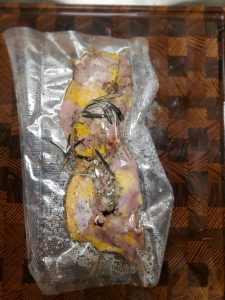
My simple way makes its own duck fat and gets an identical result, although it does require one special piece of equipment: the sous vide. “Sous vide” is a cooking technique where foods are vacuum-sealed in a bag and cooked in a precisely controlled, low-temperature water bath over a long time. These are becoming more and more popular and can easily be bought for an affordable price today.
To make my Hunter’s Confit, salt cure your thigh quarters for 24 hours then wash and pat them dry. Vacuum seal the thighs and drop them in a 5-gallon bucket of water. Put the sous vide in the bucket and take it to 155° F for about 24 to 36 hours. You’ll need to top the water off occasionally as it evaporates, but that’s it. When you see the leg meat pulling up and the clean white leg bone starting to stick out, you know they’re done. Let them cool and you can simply leave them in the bag until ready to eat. When you are ready to serve them, pour the contents of the bag in a skillet, rendered the fat included, and cook skin side down until crispy. I promise you, you will never throw a duck leg away ever again.
Honorable Mentions: Duck Giblets and Other Uses
Not to be forgotten are the giblets. Gizzards and livers are always an option, but my absolute favorite are the duck hearts. I’ve surprised many a hunter with this trick and it never goes wrong. The hearts take only a few seconds to remove from the cleaned duck, and about the same amount of time to cook. The simplest thing to do is butterfly the hearts open and remove the sinew at the top, then flash cook in butter with some salt and pepper for about 10 seconds on each side. It’s a fun little appetizer and it tastes better than a duck breast.
My final little trick worth trying if you’ve made it this far into my duck seminar is to take the duck feet leftover from the thigh quarters and roast them in the oven or dehydrator until dried and leathery. They make fantastic dog treats, and they deserve a cut too, don’t they?
Henri Watson
Wild Game Cooking: Transforming Ducks into Delicacies
My favorite thing about cooking wild game is that you always have the opportunity to surprise someone who didn’t know it could be so great. It’s sad to see so many duck hunters who don’t appreciate what a delicacy the meat can truly be. It reminds me that there was a time in history when bluefin tuna was considered a trash fish and was only used in dog food. With proper care and preparation, wild ducks can be made to impress even the most apprehensive of us all. It is a learning process that is well worth the reward.
Find your favorite wild game recipe at Mossy Oak Ingredient Wild
Join our weekly newsletter or subscribe to GameKeepers Magazine.
Your source for information, equipment, know-how, deals and discounts to help you get the most from every hard-earned moment in the field.

