Seed Facts and Planting Tips
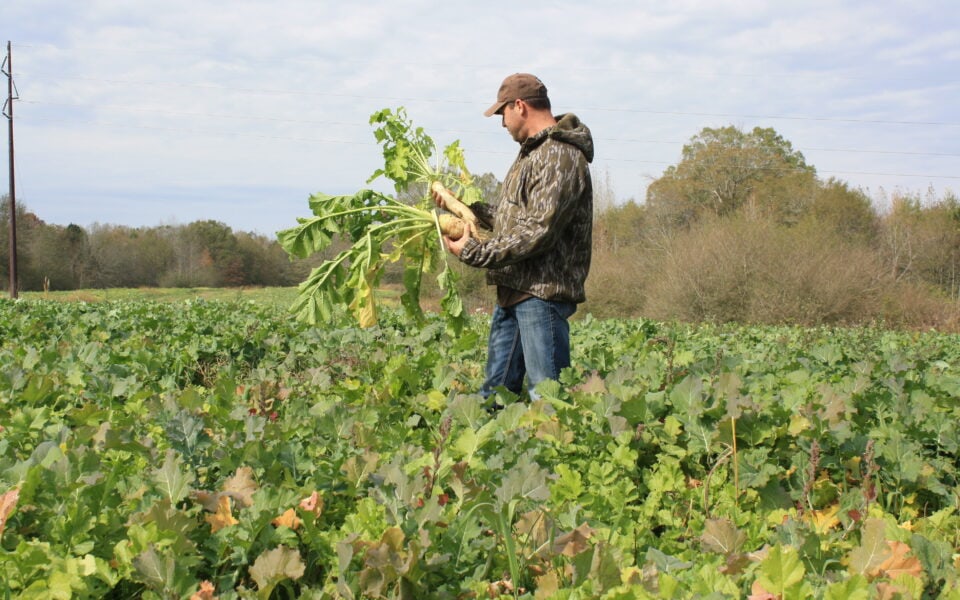
The power contained within a seed is amazing! How can something as small as a turnip seed, that is only slightly bigger than the period at the end of this sentence, produce a plant that has a bulb the size of a softball and leaves as big as a boat paddle!? Better yet, look at the results that a single acorn can produce given time. So how does the germination process work?
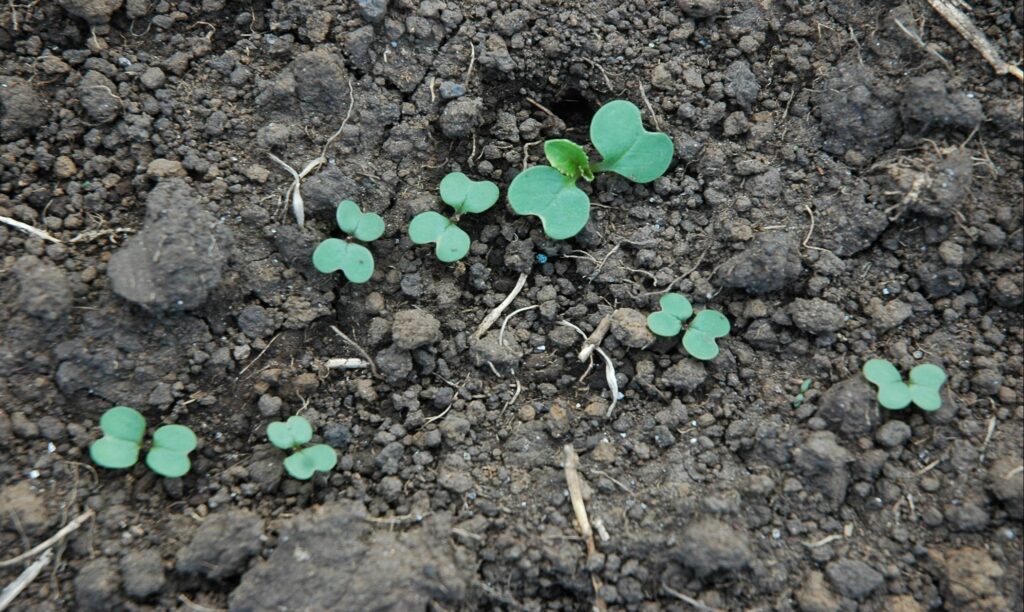
Germination by definition is the process by which the plant embryo within the seed resumes growth after a period of dormancy and a seedling emerges. A seed basically needs 3 things to begin growth. Location plays a major part in the success or failure of a seed. Very small seeds such as clover or brassica do not contain the amount of energy a much larger seed such as corn or lablab does and therefore do not need to be more than 1⁄2 inch deep, 1⁄4 inch is ideal.
What usually happens when small seeds are planted too deeply? Once they receive the moisture and begin to germinate, they run out of energy before they reach the surface. The larger seeds have the stored energy and ability to push through to the surface from a greater depth. Moisture is the next and maybe most obvious need for seeds to begin germination. The moisture already present in the soil at planting time is sometimes enough to get the process started. Some seeds with a very hard testa (seed coat) like a sunflower for example, generally need a good rain to get the testa to begin to break down.
One problem with leaving large seeds like soybeans laying on the soil surface and not covered at a proper depth is oftentimes a good rain will begin the break- down of the seed coat, the seed then begins to try and push its newly formed root through the soil surface, which is now drying out and probably crusting-over until the next rain. Large seeds left on the soil surface are also very vulnerable to birds and other pests.

Soil temperature is the other important factor for a seed to begin life. While some seeds can germinate with a soil temperature as low as 60°F or as high as 95°F, but most seeds have an ideal germination temperature from the mid-70s to the mid-80-degree range. Seeds will germinate at lower temperatures, but the success rate may go down some.
One of the most common mistakes when planting food plots is improper soil coverage, whether it’s too deep or too shallow. So the question, “How deep should I plant?” is a question with several variables. Very small seeds such as rape, clover, chicory, turnips, or alfalfa need very little soil covering for good germination. Oftentimes these small seeds get disked-in or planted in a field with a fluffy seedbed with a lot of airspace and the result is very poor germination.
These tiny seeds just don’t contain enough energy to push up through 2 inches of soil. Ideally, after working up your plots with a disk, harrow, or tiller, the field should be cultipacked in preparation for spreading these small seeds. After broadcasting onto a “firm seedbed,” it can then be cultipacked again to incorporate the seed into the top 1⁄4-1/2 inch of soil.
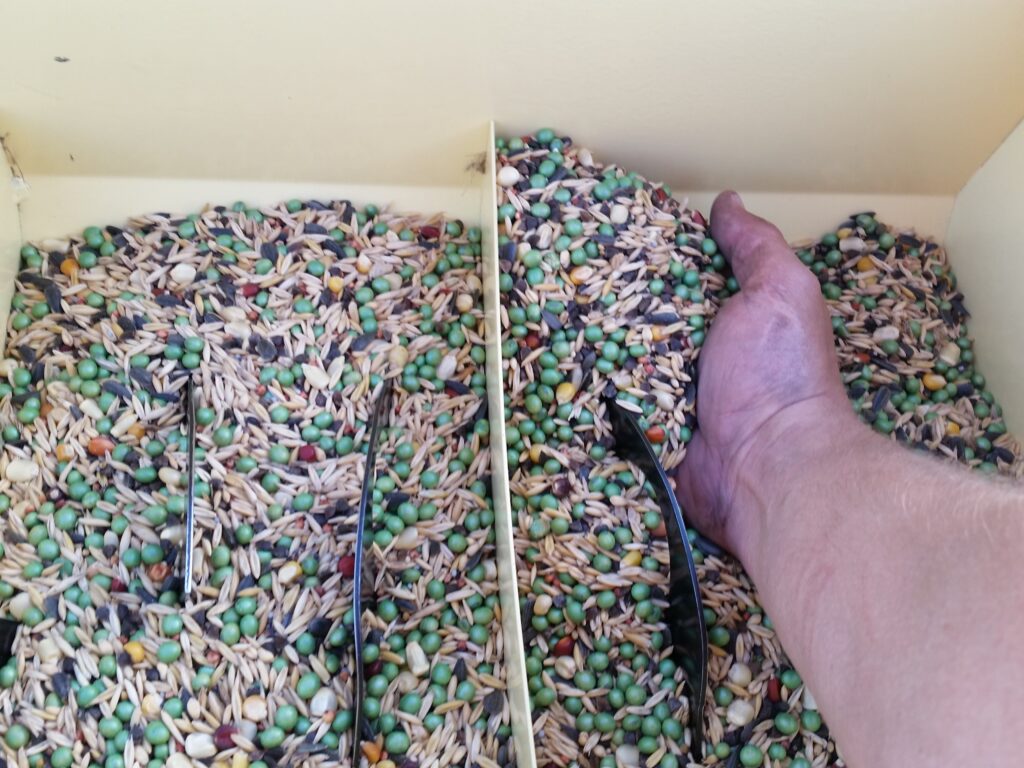
Using a light drag after broadcasting seed can also achieve this if a cultipacker is not available. On the other end of the spectrum, there are large seeds like corn, chufa, or lablab for example, that need 1-2 inches of soil covering to get good germination. Large seeds left on the soil surface are easy food for birds and other pests and generally have very poor germ results.
I have found that chain harrows with aggressive teeth work well to cover larger seeds when the option of using a no-till drill or planter isn’t an option. Plots, where these larger seeds are planted, can also be cultipacked as the last step to ensure good seed to soil contact.
Everyone has different soil types and therefore different types of equipment for planting are needed. Make sure to pay attention to your planting process and seed size so you properly cover each seed type.
It is important to point out that there are major differences in the timing for where you might live compared to other gamekeepers. For example, the person planting in Maine may have a 45-60 day difference in optimum planting time compared to someone planting in southern Tennessee. This is somewhat further complicated by the fact that some species of plants often used in food plots have varying ideal planting times This large gap is confusing to some and often leads to food plots being planted too early or too late which in return results in sub-par plots.
As a quick example, if we use the previously mentioned areas, the hunter in Maine who wants to plant an all brassica blend ideally should try to plant around the middle of July. On the flip side, the hunter in the Deep South won’t plant that same blend until mid to late September.
One issue that a lot of food plot managers often run into is what to do with plots that are planted with warm-season annuals like beans, lablab, or peas that are still producing good quality food, but it’s also time to prepare that same ground for cool-season annuals for the hunting season. I don’t know that there’s a perfect answer or solution to this issue, but I have found that leaving a strip or section of the warm season annual standing will continue to provide food while you prepare the majority of the plot for your cool-season planting.
Once a frost hits or the warm season annual matures to the point of non-use, a cereal grain like wheat or oats, that germinates quickly, can be planted. This tactic of leaving strips of various crops standing is great for creating diversity.
Another common problem is showing up to plant, but your weeds are 3 to 4 feet high in the plot. The problem doesn’t lay in the weeds themselves but what happens when you try to incorporate a few tons of this green biomass into the top few inches of soil you are turning over. There is nothing wrong with letting a field sit fallow during the spring and summer months, those weeds and grasses often contain beneficial native browse and are good sources of cover during fawning and bird nesting.
There is also great benefit in disking or cutting-in a season of “biomass” and “organic material,” the problem comes when it is attempted the same day you are trying to create a good seedbed for planting.
Ideally, this would need to be done at least a couple of weeks, if not a month ahead of planting. The other option is cutting and spraying if you let fields sit fallow during the spring/summer, but you intend to plant the plot for the hunting season. You will burn less fuel and effort by cutting and then spraying the plot a couple of weeks ahead of your planned planting date. A properly applied non-selective herbicide will kill the weeds and create a very dry and much easier to manipulate the material.
Seedbed preparation is extremely important in growing successful food plots. Many planting failures can be attributed to poor seedling survival or lack of germination due to incorrect planting depth and poor seedbed prep. This is especially critical when planting small seeds like clover, chicory, brassicas, or alfalfa. These seeds need a covering of no more than 1⁄4 inch of soil.
Oftentimes, when plots are disked or tilled, the seedbed is left fluffy – this is not conducive for small seeds to germinate. Many times when small seeds are broadcast onto a very finely disked and fluffy seedbed, even a moderately heavy rain causes some seeds to be buried too deeply and results in an uneven stand. Ideally, when planting smaller seeds, fields should be cultipacked after disking or tilling to firm the seedbed up.
Seeds can then be broadcasted, and for the best seed to soil contact, fields can then be cultipacked again. This process creates a great environment for seedling survival by incorporating the seed at the proper depth. Cultipacking also allows moisture to move through the soil profile properly and keeps it around the seed as it germinates. Leaving a seedbed un-packed and full of “air space” allows the soil to dry out much more rapidly and increases the chance of plot failure.
 At BioLogic, a question we are often asked is, “What kind of fertilizer do I need to use on various crops?” That is a great question and one with a lot of variables. There is no substitute for an up-to-date soil test that gives pH and nutrient levels.
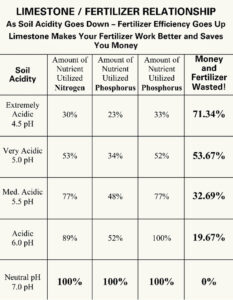
Adding agricultural lime to neutralize the acidity of the soil is an often overlooked step, but one that is a major factor in growing crops correctly. For example, soil with a pH level of 5.0 is 100 times more acidic than one at 6.0. At a level of 5.0, 60-70% of the fertilizer added is unusable by the plants. Not only will food plot crops grow better in less acidic soil, but you will also see improved utilization due to it tasting better. For most all food plot crops, both warm and cool season, a pH of 6.2 to 7.0 is ideal.
Many hunting clubs and individuals work on a pretty tight budget when it comes to planting food plots. When soil tests reveal a low pH level, money is much better spent on getting the appropriate amount of lime added to the soil rather than more fertilizer. “Adding lime” is a chore I often relate to “planting a tree,” when someone asks when should they plant it? The best time was “yesterday,” the next best time is right now. Lime takes time to breakdown and doesn’t neutralize acidity and change soil pH overnight.

Fertilizing is a little different, in my opinion. Depending on your soil type, fertilizers break down and are utilized by plants or are leached out of the root zone more quickly than lime.
So, for example, if you know by a recent soil test that your plot needs a given amount of fertilizer for optimal growth, I wouldn’t suggest adding that fertilizer six months ahead of the planting date.
I think you get more bang for your buck and better plot results by incorporating the fertilizer and disking it in just prior to, or right at planting time. This especially holds true when planting in hot and humid conditions and you are using a high nitrogen fertilizer like 34-0-0 or 46-0-0 for cereal grains and brassicas.
It is beneficial to work in these nitrogen fertilizers just before planting because in high heat and high humidity situations a lot of the nitrogen can be lost through volatilization if they are left laying on the soil surface. The next best would be to apply it right before a rain, but working it into the soil is my recommendation.
Seeds have the ability to do amazing things when properly cared for and planted. “Farming for wildlife” can be much more enjoyable when you take the time to do the “little things” correctly to ensure success.
Join our weekly newsletter or subscribe to GameKeepers Magazine.
Your source for information, equipment, know-how, deals, and discounts to help you get the most from every hard-earned moment in the field.


