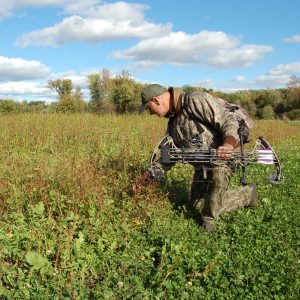
The terms “no-till food plots” or “no-plow food plots” can be very misleading when it comes to food plot products. I believe when companies use these terms it gives “newbie’s” a false sense of hope – it tells them that it’s acceptable to cut out an important step in the planting process and everything will be OK. The problem being – these types of products are often sold to first-timers or food plot farmers that don’t have the equipment necessary to complete all the planting steps according to the book. The truth is; if a few key steps are followed, these smaller, “honey-hole” type plots can be created, and they can be very effective at attracting mature bucks during legal shooting light.
The more steps you skip in the planting process, the more you will sacrifice in attraction, yield and palatability of a plot until you get to a point where you have a total failure. Is it possible to plant a food plot without working/turning the soil? Absolutely; however, if you’re going to skip this very important action, some of the remaining steps become much more essential and must be completed correctly.
Remember also, these small kill plots don’t need to be “picture perfect,” they only need to be effective.
Choosing Your Food Plot Seed
To begin, choosing a crop that will do well in often less than desirable planting conditions is crucial. These small hidey-hole type plots are often located within, and/or very close to timber. Will it get full sun…partial sun… not all crops are suited for this? Areas back-in off the beaten track that haven’t been farmed before will often have acidic soil. Without the ability to incorporate lime into the soil to reduce the soil’s acidity, in this case you should choose a crop that will do well in a lower pH.
 The size of the seeds must also be taken into consideration. For the most part, you’ll need to use small seeds that have a planting depth of ½ inch or less. If you aren’t working the soil to prepare a deeper seedbed, you’ll have to utilize what Mother Nature left you. So that means large seeds like corn, beans and peas with a planting depth of an inch or more will likely need to be passed on unless you do have an implement that will bury the seeds the appropriate depth, or an awful lot of “elbow grease.” Instead, small seeds like clovers, brassicas, chicory, alfalfa and some cereal grains will need to be your choices.
In a springtime no-till plot (in the north), products like Clover Plus or Non-Typical would be good choices (late summer through fall in the south). The tiny clover and chicory seeds make easy seed-to-soil contact. Spring planted no-till plots are not as common as a late summer/fall planting, but they can still be effective.
For late summer/fall planting (north or south) there are numerous choices – products with cereal grains like Outfitter’s Blend or Last Bite, or brassica blends like Maximum, Deer Radish or Winter Bulbs & Sugar Beets should produce good stands in a no-till situation. There are many other blends that will turn out pending you follow the necessary steps.

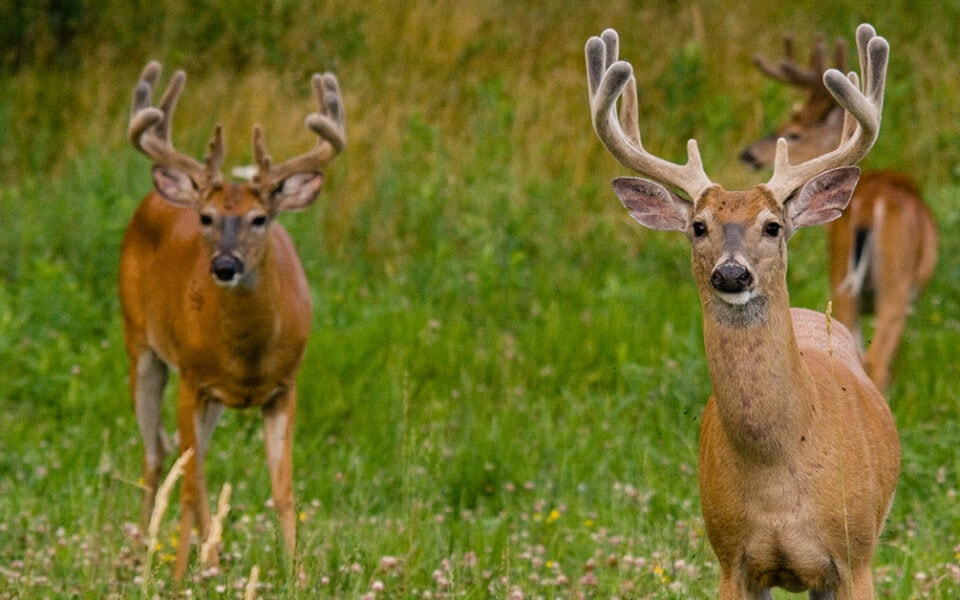
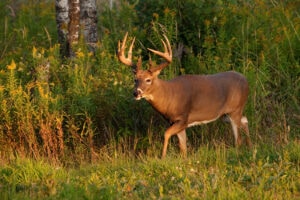
These remote areas often provide the best opportunities for coming into contact with mature bucks, but the worst location for a food plot. A blend like Hot Spot has been scientifically designed and is meant for a no-till situation. The plants in this blend will grow on concrete! Well… I may be exaggerating a bit, but the plant types in Hot Spot (buckwheat, two varieties of rape, daikon radish and ryegrass) are fast germinating, extremely attractive to deer and incredibly easy to plant.
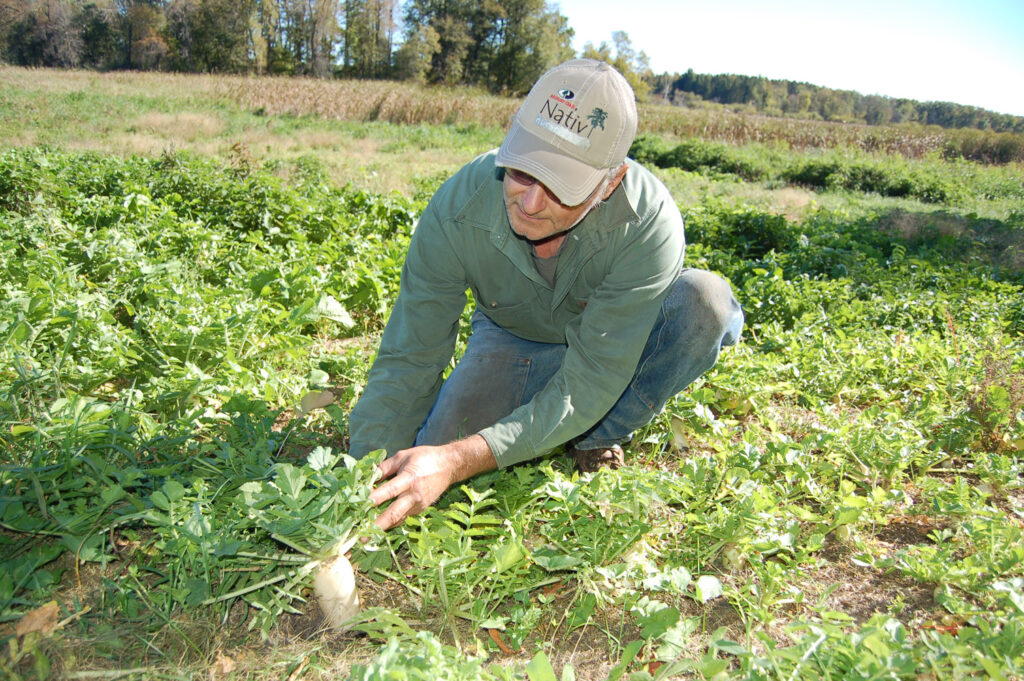
My two top choices would be Deer Radish for an annual, and Clover Plus for a perennial. BioLogic’s radishes are both, one of the best plants that I’m aware of for improving the soil and one of the most attractive plantings I’ve ever witnessed whitetails “attack.” Clover Plus is easy to plant, maintain and grow and day in and day out it’s the most reliable crop I’ve ever planted.
My uncle, David Medvecky, will often mix up his own fusion; one of his plots that I’ve had the opportunity to hunt over that I found amazingly effective included a mix of BioLogic Deer Radish, Winter Peas, vetch, buck-wheat, and clovers including Non-Typical. Granted, he is very experienced at planting, but it was the mix of plants and their varying palatability times that impressed me. Whitetails were hammering this plot from opening day all the way into December and until the food was gone and covered with snow.
Steps to Ensure No-Till Success
As said, if you’re going to skip a major step like seedbed preparation you must make certain the rest of the procedures in the planting process are completed properly. Along with other details, there are three vital steps to ensuring success;
- Choose a suitable location.
- Eliminate the existing vegetation (competition). You don’t want your crop competing with native plants for sunlight, moisture and soil nutrients.
- Make sure your seeds make contact with the soil. For good germination the seeds must be planted the appropriate depth.
Food Plot Location
A good rule of thumb in choosing a location is; if significant vegetation grew on the site during the prior growing season that normally indicates there should be enough sunlight hitting the spot, it should be receiving adequate moisture and the soil should be suitable to sustain plant life.
Some people think they’re going to plant a no-till plot back in the “boonies” near their treestand where there’s only a bunch of matted down leaves or pine needles. If there’s not something currently growing in the spot, what makes you think your food plot would grow any better? In this case, I would make sure to remove some canopy trees before ever attempting to plant the site. Four hours of direct sunlight is the absolute minimum. Buckwheat, brassicas, some cereals, and some clovers can be grown in as little as four hours of direct sunlight per day, but I would want six hours per day or more to grow most other plant types.
 A soil test would be a good idea for several reasons. Obviously, just like any plot, we need to know what we’re dealing with so we know what to add for success. However, in the case of a no-till plot, since we cannot turn the soil, adding lime to reduce the soil’s acidity will be much less effective.
Lime, works best when you can place the lime particle where you want it to do its job, which is “throughout the soil column where the plant’s roots will be,” so working lime into the soil performs best – after the lime application, one would normally want to work the lime into the soil six to eight inches. Since we’re unable to do that with a no-till approach, again, plant selection will be crucial. An application of pelletized lime may help somewhat, but it will be important to choose a crop that will grow in the pH that you currently have since raising it (or reducing the soil’s acidity) will be more difficult without being able to turn the soil.
It will be important that you pay attention to your soil test results and make sure you apply the NPK fertilizer called for in your test’s recommendations. Since in these situations, let’s be honest, most don’t do a soil test. That doesn’t mean you shouldn’t still add fertilizer.
In a no-till situation BioLogic’s M.E.E.N. Green Water Soluble Fertilizer can be just the ticket. This unique product contains water soluble phosphorous which helps stimulate root development and increased plant growth. Healthier root systems allow plants to more efficiently utilize soil moisture. It also provides plants with key micronutrients which are often unavailable in ordinary fertilizers. The main advantage in this no-till situation; however, is the fact that the nutrients are absorbed through the plants’ leaves and stems (in addition to the roots), so even in acidic conditions the plants will be able to utilize these important nutrients more effectively. This unique formula makes plants healthier and noticeably more attractive to whitetails. This approach works best when applied shortly after germination.
A granular fertilizer can also be applied at planting time. This is a good approach if you won’t be able to get back to the plot after the plants have germinated. In absence of a soil test, about 400 lbs. of 10-10-10 per acre (or the equivalent) should suffice.
Eliminate Competing Vegetation
It is vital that you remove all competing vegetation. Plain glyphosate (Roundup) is usually the best, easiest and least expensive choice for this job. There were ideal conditions at the spot for whatever native plant was growing there before, now you need to remove those plants and create “ideal conditions for your new proposed crop.” If there is a lot of plant mass to kill and remove, some managers may plan a no-till plot a year in advance and begin killing weeds the year prior.
Since we’re cutting a corner I want to use every other advantage I have at my disposal. If I’m planting a crop that DOES NOT contain a desirable grass (like oats, wheat, corn or sorghum) a selective grass herbicide like Weed Reaper can also be used. This clethodim-based herbicide is designed to kill annual & perennial grasses without harming my broadleaf food plot crops. Weed Reaper eliminates all grass competition. This will extend the life and productivity of the plot. It can be tank mixed with M.E.E.N. Green to increase its effectiveness – so you can “foliar feed” the crops you want to protect and at the same time, kill the grasses all in one application. Best results will be achieved by spraying grasses when they are young and thriving so the poison is readily absorbed. I like this product because it already has the surfactant included so all I have to do is mix it with water. It also comes in a “food plot farmer friendly” pint (one acre size) so I don’t have to store two-and-a-half gallons of herbicide at every property I oversee.
Seed to Soil Contact
If there is a matt of vegetation, like a layer of sod, it must be removed. All dead plant matter should be raked out of the plot. For late summer planting there will often be tall, green plants or grass growing so you may need to mow before you spray your herbicide. If you mow, make sure to wait a few days before you spray the herbicide. Mowing will shock the plants into dormancy and you want your target plants growing robustly so they suck the poison into their root systems. Regardless, the dead plant residue needs to go. A plain garden rake and some elbow grease will work to remove it, or an ATV with a harrow type drag will cover ground much faster. A lawn de-thatcher pulled behind an ATV or tractor also works well for removing debris. The seeds need to make contact with the soil, not get caught up in the dead plant residue.
 Even if the seeds could make it through the residue to the soil and germinate, all the decaying plant material would rob nitrogen and other nutrients from your new seedlings. The process of breaking down dead plant matter in the soil and turning it into valuable organic matter will take precedence over the process of plant growth. It robs the soil of the energy that should be going to your plants. So the dead plant residue must go.
The type of soil you have can also make a difference – clay through the spectrum to sand. The weather conditions you’re experiencing will also have an influence on your germ rate. For instance, if you have clay soil and experience a heavy rain and then an extending period of dry, hot weather the soil may form a crust making it almost impossible to achieve good seed-to-soil contact. There are many different seed germination and growth scenarios that can play out depending upon the countless combinations of soil types and current conditions.
Oftentimes even if you have “all the equipment necessary to plant anything” a no-till planting approach may be the best route. On my Ontario property we have very rocky soil. It’s taken numerous years to physically pick out the rocks by hand and now we have about 24 acres that we can safely run a disk through and we’re adding more all the time. When claiming new ground; however, until the rocks are pulled out we often employ a no-till method.
These types of “kill-plots” work very well when combined with a water source, mast crop trees of some kind (acorns, hickory nuts, walnuts or soft mast like apples, pears, persimmon, berries and fruits such as crabapples, blueberries, and service-berries, etc), a mineral site or fresh cut browse. A convenient, “one stop shop” for your whitetails – give them multiple reasons to want/need to be there. These spots will work best when adjacent to thick escape cover.
Take advantage of places that may already have the soil disturbed for you – the edge or corner of an agricultural field, spots that have recently been burned (prescribed or wild-fire), dozer pilings, logging areas, roads or trails, etc. These all in essence could be “no-till” plot options. I would consider ANYWHERE the sunlight hits the soil.
The ultimate no-till planting method would be a no-till drill. Advantages of using a no-till drill are so great that often it can be the best way of planting many crops, whether it is a cash-crop or food plot. It saves time during a very busy time of the year for a land manager, prevents soil erosion, increases yield, lowers costs and is MUCH better for the soil. Because tilling isn’t necessary, a no-till grain drill can make the difference in being able to plant during a wet year and planting on inclines where we couldn’t before because with tilled soil the slope would have caused severe erosion. A plot still must be free of large rocks and sticks, but a no-till drill is a tool that most food plot farmers dream of having.
However, without the luxury of a no-till drill, food plot farmers can still produce a decent stand without turning the soil. Since we’re cutting out a major action in the planting process we must ensure the other steps are executed adequately. No-till planting is a great method to produce a plot in a spot where the ground cannot be worked due to excessive rocks, stumps or other debris, a site where you cannot get equipment to, or for first time farmers who don’t have the necessary equipment. Creating a proper seedbed will usually produce better results, but this is a technique that is ordinarily used when customary planting approaches are out of the question. A no-till plot may not look as pretty as a well prepared seedbed, yet you can still produce tons of forage for your wildlife.
Join our weekly newsletter or subscribe to GameKeepers Magazine.
Your source for information, equipment, know-how, deals and discounts to help you get the most from every hard-earned moment in the field.